As an Amazon Associate, we earn from qualifying purchases. Some links on this site are affiliate links at no extra cost to you. Our recommendations are based on thorough research and editorial judgment.

How to Do the Instant Pot Water Test Before First Use
All right, here’s the thing—before you trust your Instant Pot with actual food, you’ll want to run a water test. Fill the inner pot with a few cups of cold water, seal the lid, and flip the venting knob to sealing. Hit high pressure and watch that floating valve pop up as steam builds (takes about 13 minutes). Once it rises, you’re golden. Quick release the pressure, confirm that valve drops back down, and you’re done. If something goes sideways, we can dig into what went wrong.
Key Takeaways
- Inspect the sealing ring for twists, damage, or debris before performing the water test.
- Add 2–3 cups of cold water to the inner pot, then lock the lid until it chimes.
- The display shifts to “On” and the floating valve should pop up within approximately 13 minutes.
- Use quick release by switching the venting knob from sealing to venting position carefully.
- Float valve should drop about 30 seconds after pressure fully releases, confirming successful pressurization.
Check Your Instant Pot’s Safety Components Before Starting
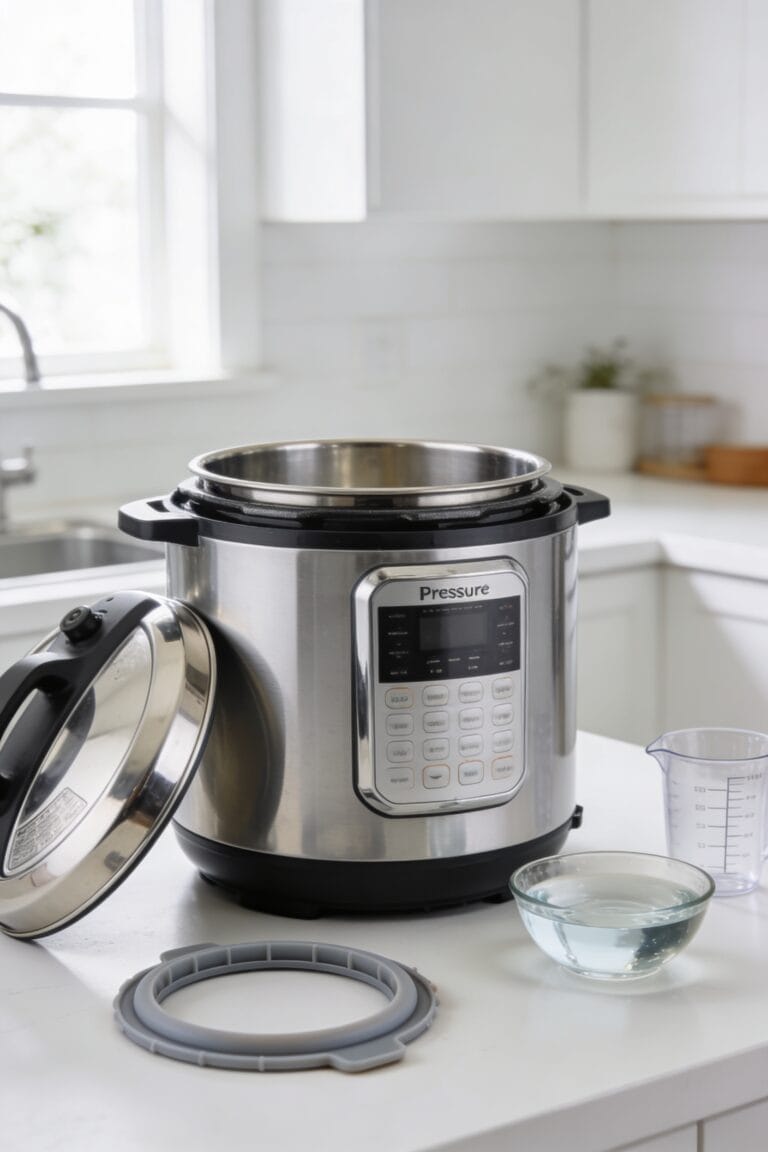
Before you even think about plugging in your Instant Pot, you’ve got to do a quick safety inspection—and I’m not just saying this because the manual tells you to (though it does, and for good reason). Start by examining your sealing ring carefully. It needs to sit flush against the lid with no twists, damage, or debris clinging to it. Next up is valve inspection—make sure your floating valve moves freely without any obstruction. Check that the anti-blocking shield is positioned correctly underneath. Then inspect your venting knob to confirm it’s clear and unobstructed. Finally, verify your inner pot sits securely in the base. These five minutes of prep work genuinely matter. You’re not being paranoid; you’re being smart.
Add Water and Seal the Lid Properly

Now that you’ve got your safety components locked down, it’s time to set up the water test itself—and I promise this part is straightforward. Grab your inner pot and verify gasket placement one more time; that silicone ring needs to sit snugly in its groove with zero gaps. Measure alignment matters here because a misaligned gasket won’t seal properly, and you’ll end up frustrated.
Add 2-3 cups of cold water directly into the inner pot—not the base, that’s a common stumble. Pop the lid on until you hear that satisfying chime confirming the seal locked. That sound? That’s your green light that everything’s ready to pressurize. You’ve officially moved past setup into the actual test.
Watch the Pot Pressurize and Float Valve Rise
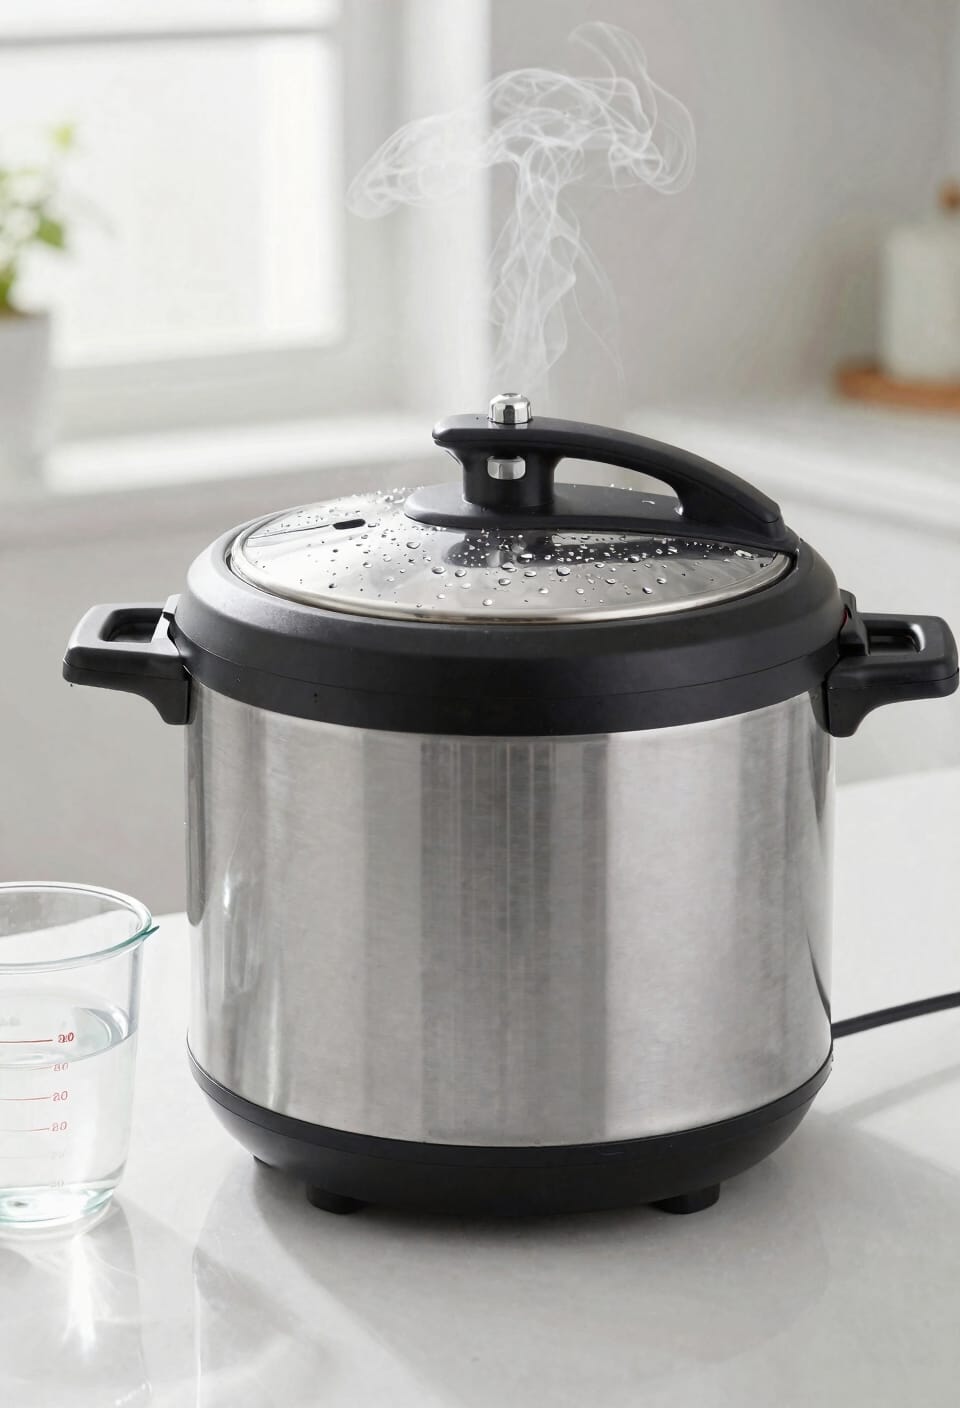
Once that lid chimes and seals, your Instant Pot springs into action—and this is where the magic starts happening. You’ll notice the display shifts to “On,” and the heating element beneath that inner pot gets serious about its job. The water’s warming up, steam’s building, and here’s where valve behavior gets interesting: you’ll see that floating valve sitting there like it’s minding its own business, then suddenly it’ll pop up as pressure accumulates inside. Don’t panic and don’t touch anything. This steam dynamics thing is automatic—the valve rises independently when sufficient pressure builds. It typically takes around 13 minutes for models like the Duo to reach high pressure. Just watch it happen. That float valve rising? That’s your confirmation everything’s working exactly as it should.
Monitor the Cycle at Constant Pressure
That float valve popping up signals you’ve crossed the threshold into the actual cooking phase, and this is where patience becomes your greatest asset. Now you’re watching pressure stability in action—your Instant Pot’s holding steady at 12 psi, which is exactly what you want. Don’t fidget with the lid or buttons. The display accuracy shows you’re in the thick of it, and honestly, that’s when most people get nervous for no reason. Keep Warm might kick on automatically, which is totally normal. You’re just sitting here, letting the machine do its job. The whole constant pressure stretch typically runs about 13 minutes or so, depending on your model. Just watch, trust the process, and resist the urge to peek.
Release Pressure Safely Using the Quick Release Method

After that solid 13-minute pressure hold, you’re ready to let the steam out, and this is where the quick release method comes in—it’s honestly the safest and most straightforward way to go. All right, here’s what you do: locate the venting knob on top of your lid and carefully switch it from the sealing position to venting. Steam’ll hiss out—and I mean *hiss*—so keep your face and hands well clear of that steam venting action. Burn hazards are real here, folks. The whole thing takes maybe 30 seconds before the float valve drops, signaling that pressure’s completely released. Once it settles, you’re safe to open that lid. Quick release beats waiting around, and you’ve just proven your Instant Pot works perfectly.
Troubleshoot Issues if the Test Doesn’t Progress Normally
Now, if your water test didn’t go smooth as butter—if the float valve never popped up, or the display stayed stuck on “On,” or you got through the whole thing without any steam action—don’t panic and don’t assume your Instant Pot’s broken.
First, check for a steam leak around the lid. Your sealing ring might not be seated properly, or debris could be blocking it. Give that ring a close inspection and reseat it firmly.
If you’re not seeing pressure build at all, your pressure sensor might be acting up. Try unplugging the unit for a few minutes, then plugging it back in to reset the system. Sometimes that’s all it takes. If issues persist after these troubleshoots, contact customer support.
Frequently Asked Questions
How Long Does the Entire Water Test Take From Start to Finish?
I’d say you’re looking at roughly 20 minutes total duration for the entire water test. The setup time takes a few minutes, then heating and pressurization consume about 13 minutes, and quick release finishes it.
What Voltage Outlet Should I Use for My Instant Pot Model?
I’d check your model’s manual first—you’ll find your specific power requirements there. Most Instant Pots use either 120V or 220V outlets depending on your model. Match your plug type accordingly to avoid electrical issues.
Can I Use Hot Water Instead of Cold Water for the Test?
I’d recommend using cold water instead of hot or warm water for your water test. Cold water lets you accurately observe the full heating and pressurization cycle, ensuring your Instant Pot functions correctly from start to finish.
Should I Set a Cooking Time for the Water Test Cycle?
I’d recommend setting a timer for about 5-15 minutes so you can monitor the float valve’s rise. Once it lifts, you’ll know pressurization’s complete, and you’re ready to release the steam safely.
Is the Water Test Necessary if I’ve Used Pressure Cookers Before?
I’d still recommend doing it. Each pressure cooker model has unique features and safety mechanisms. The water test gives you safety reminders specific to your Instant Pot and sets proper user expectations for this particular device’s operation.
Conclusion
Look, you’ve just walked your Instant Pot through its baptism by fire—well, steam anyway. That water test isn’t just some bureaucratic box-ticking; it’s your golden ticket to confident cooking ahead. You’ve proven your pot’s got the right stuff, so now you can stop white-knuckling every recipe and actually enjoy the magic of pressure cooking. You’re ready.